On an electric water heater, checking a thermostat means shutting off power at the breaker, removing the access panels, and testing each thermostat with a multimeter set to continuity or ohms. A working thermostat shows continuity (a reading near zero ohms) when it’s calling for heat. On a gas water heater, the thermostat is built into the gas control valve and can’t be tested with a multimeter — checking it means confirming the pilot, thermocouple, and burner are working correctly, since those are usually the real cause of temperature problems.
A water heater that runs cold, scalds, or cycles unpredictably often gets blamed on “the thermostat,” but the actual checking process is very different depending on whether the unit is electric or gas. Electric water heaters use one or two physical thermostats you can test directly with a multimeter. Gas water heaters use a sealed gas control valve that senses temperature internally, so there’s no dial or component you test the same way.
This guide walks through both. For electric units, it covers the full multimeter testing process, How to Fix a Water Heater for complete troubleshooting and repair steps. including the high-limit reset button and how to tell a bad thermostat apart from a bad heating element. For gas units, it covers what to check around the gas control valve, since that’s usually where a real fix is found. It also covers temperature settings, common symptoms, and when the problem points to something other than the thermostat itself.
What Signs Point to a Thermostat Problem?
Before testing anything, it helps to match the symptom to the likely cause.
- No hot water at all, even after giving the tank time to recover, often points to the upper thermostat or a failed upper heating element.
- Water that runs out faster than it used to, or slow recovery between uses, more often points to the lower thermostat or lower element.
- Scalding hot water, not just warm, can mean a thermostat is stuck calling for heat or set too high.
- A reset button that keeps tripping on the upper thermostat usually means the water is overheating, which can come from a bad thermostat or a failed element rather than the reset button itself.
- Inconsistent or fluctuating temperature on a gas unit often points to sediment, a dip tube problem, or the gas control valve rather than a simple dial adjustment.
None of these symptoms confirm the exact cause on their own. Testing is what narrows it down.
How Do You Check a Thermostat on an Electric Water Heater?
Testing an electric water heater’s thermostat means shutting off power, exposing the thermostat, and using a multimeter to check for continuity. Most electric water heaters have two thermostats, an upper and a lower, each controlling one heating element. The process is the same for both, though they’re tested separately.
Tools and Materials You’ll Need
- A digital multimeter capable of measuring ohms or continuity
- A non-contact voltage tester
- A flathead or Phillips screwdriver, depending on the panel screws
- A phone or notepad to record wire positions before disconnecting anything
Most homeowners already have these on hand, or can find them at any hardware store for a modest cost. No specialty tools are needed for this test.
Step 1: Shut Off Power at the Breaker
Locate the breaker labeled for the water heater and switch it off. Confirm the power is actually off using a non-contact voltage tester at the panel before touching anything inside. Water heaters run on 240 volts in most homes, which is enough to cause a serious shock, so this step isn’t optional.
Step 2: Remove the Access Panels
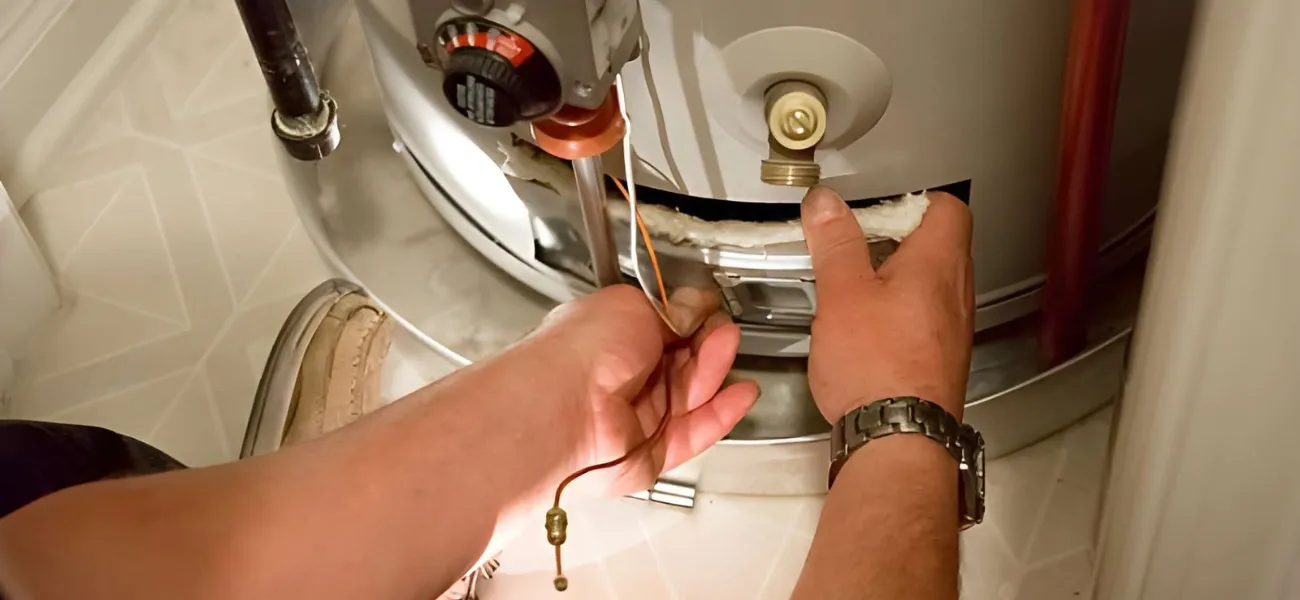
Unscrew the outer access panel covering each thermostat. Most tanks have two, one near the top of the tank and one lower down. Behind each cover, move aside the insulation and the plastic safety guard to expose the thermostat and its heating element.
Step 3: Disconnect the Wires
Take a photo of the wiring before disconnecting anything, so you can reconnect it correctly. Even with the breaker off, disconnecting the wires isolates the thermostat completely and gives a cleaner multimeter reading. Use a screwdriver to loosen the terminal screws and set the wires aside.
Step 4: Set the Multimeter and Test for Continuity
Set the multimeter to the continuity setting, sometimes marked with a small horseshoe symbol, or to its lowest ohms range. Turn the thermostat’s temperature dial to its highest setting before testing, since some thermostats only show continuity when calling for heat. Touch one probe to each of the thermostat’s terminals.
A reading at or near zero ohms, or a beep on models with an audible continuity setting, means the thermostat has continuity and is likely functioning. No reading at all, or a reading that doesn’t change no matter the dial position, points to a failed thermostat.
Step 5: Check the High-Limit Reset Button
The upper thermostat has a small red reset button built in. If it’s tripped, it will feel like it needs to be pressed back in. Pressing it resets the safety cutoff, but a button that keeps tripping usually means something else is causing the water to overheat, whether that’s the thermostat itself or a shorted heating element, so don’t stop testing just because the reset solved it once.
Step 6: Test the Heating Element Separately
A failed heating element can produce the exact same symptoms as a bad thermostat, so testing the element rules it out. Disconnect its wires and set the multimeter to the ohms setting. Touch the probes to the element’s two terminals. A working element typically reads between about 10 and 30 ohms. A reading of zero or infinite resistance means the element itself has failed and needs replacement, separate from anything happening at the thermostat.
Step 7: Reconnect and Restore Power
Reattach the wires to their original terminals using the photo you took as a reference. Set both thermostats to the same temperature, generally no higher than 120 degrees Fahrenheit, replace the safety guard, insulation, and access panels, then restore power at the breaker. Give the tank close to an hour to reheat before testing water temperature at a faucet.
How Does the Thermostat Work With the Heating Element?
A thermostat doesn’t heat water itself — it acts as a switch that turns its heating element on when water temperature drops below the set point and off once it’s reached. On most electric units, the two thermostats also communicate with each other so only one element runs at a time under normal conditions, which is why a wiring mix-up during reassembly can cause both elements to run together or neither to run at all. This is also why testing the element separately from the thermostat matters: a multimeter reading a bad thermostat can look identical to one reading a failed element if you only test one of the two.
What Do the Multimeter Readings Actually Mean?
A thermostat in good condition shows continuity, meaning a low or zero-ohm reading, when it’s calling for heat, and no continuity when it isn’t. If both the upper and lower thermostats show continuity at the same time, or neither shows continuity at all, that points to a wiring issue or a thermostat that’s failed in the closed or open position. Comparing the upper and lower readings against each other, rather than reading just one thermostat in isolation, gives a clearer picture of which one is actually at fault.
How Do You Check a Thermostat on a Gas Water Heater?
A gas water heater doesn’t have a separate testable thermostat — the temperature sensing function is built into the gas control valve itself, so checking it means inspecting the components around the valve instead. The gas control valve, sometimes called a gas thermostat, senses water temperature through a probe inside the tank and opens or closes gas flow to the burner in response. It isn’t a component you can test with a multimeter the way an electric thermostat is tested.
What you can check are the parts that most often cause temperature problems on a gas unit:
- The pilot light. Confirm it’s lit and burning with a steady blue flame, not yellow or flickering.
- The thermocouple. This safety sensor shuts off gas flow if it doesn’t detect the pilot flame. A worn or dirty thermocouple is a common cause of a pilot that won’t stay lit.
- The temperature dial. Turning it up should eventually cause the burner to fire, assuming the pilot is lit and the thermocouple is functioning. If turning the dial produces no change in burner behavior at all, the valve itself may be the problem.
- Sediment at the tank bottom. Heavy sediment insulates the burner from the water above it, which can look exactly like a thermostat that isn’t responding correctly.
If the pilot is strong, the thermocouple checks out, and the water still won’t heat correctly or won’t hold a set temperature, the gas control valve itself is the likely cause. On most residential units, this valve is a sealed assembly, so the standard repair is replacing the entire valve rather than servicing an internal part.
Why Can’t You Test a Gas Control Valve the Same Way?
A gas control valve is a sealed mechanical and gas-carrying assembly, not an open electrical circuit, so there are no exposed terminals to test for continuity the way an electric thermostat has. The valve combines the temperature sensing function, the pilot safety system, and the gas flow control into one part. Opening or modifying it isn’t a standard homeowner repair, since it involves both a gas connection and a safety shutoff system that has to seal correctly.
What Temperature Should a Water Heater Thermostat Be Set To?
Most manufacturers and energy guidance point to around 120 degrees Fahrenheit as a standard setting that balances safety, comfort, and energy use. Water heated above about 120 degrees increases the risk of scald injury, particularly for young children and older adults, while a much lower setting can leave a household short on usable hot water. If a unit consistently runs far hotter or colder than its dial suggests, that mismatch is itself a sign the thermostat, whether electric or the gas control valve, may not be reading temperature accurately.
Is It Safe to Test a Thermostat Yourself?
Testing an electric thermostat is a manageable task for a comfortable DIYer as long as the power is confirmed off before any wires are touched. Standing water near an open electrical panel is a serious shock hazard, so avoid this task entirely if the area around the tank is wet. On a gas unit, avoid opening the gas control valve, adjusting gas pressure, or working around the burner assembly if you smell gas at any point — leave the area and contact the gas utility or a licensed technician instead of continuing to inspect the unit.
Can a Bad Thermostat Cause Other Problems?
Yes, a thermostat that fails in the closed position can allow a heating element to run continuously, which is exactly what the high-limit reset button is designed to catch. On an electric unit, this can produce scalding water alongside a reset button that keeps tripping. On a gas unit, a control valve that fails to shut gas flow off correctly, or one that fails to open at all, produces the same kind of symptom in reverse: either overheated water or no heat at all. In either case, testing the surrounding components, not just guessing at the thermostat, is what confirms the actual cause.
When Should You Call a Professional Instead?
Call a professional if the thermostat tests fine but the problem persists, read Water Heater Repair vs. Replacement: Which Saves More Money? before deciding. if you’re not comfortable working inside an energized panel, or if there’s any smell of gas. A plumber or qualified technician can also help if wiring is severely corroded, if a gas control valve needs replacing, or if repeated multimeter readings don’t produce a consistent result. Working through the testing steps yourself is reasonable groundwork, but a persistent or unclear problem is often faster and safer to hand off.
How Often Should You Check a Water Heater Thermostat?
There’s no routine schedule for testing a thermostat the way there is for flushing a tank, since a healthy thermostat doesn’t need periodic testing on its own. Check it when a specific symptom shows up, such as inconsistent temperature, no hot water, a tripped reset button, or scalding water, rather than as preventive maintenance. Testing a thermostat that isn’t causing any symptoms adds unnecessary wear to the wiring connections without providing any real benefit.
Frequently Asked Questions
How do I know if my water heater thermostat is bad? Test it with a multimeter set to continuity or ohms. A thermostat that shows no continuity when calling for heat, or continuity when it shouldn’t have any, is faulty and needs replacement.
Can I test a water heater thermostat without turning off the power? No. Power should always be shut off at the breaker and confirmed with a voltage tester before removing any panel or touching thermostat wiring, since electric water heaters typically run on 240 volts.
Why does my water heater have two thermostats? Most electric water heaters have two heating elements, an upper and a lower, each controlled by its own thermostat. The upper thermostat also usually includes the high-limit reset button.
Can a gas water heater thermostat be repaired? Not directly. The thermostat function is built into the gas control valve, which is normally a sealed assembly. If the valve itself is at fault, the standard repair is replacing the whole valve rather than a single internal part.
What does it mean if the reset button keeps tripping? It usually means the water is overheating, which can come from a thermostat stuck in the on position or a shorted heating element. Test both before assuming a simple reset has solved the problem.
What’s a normal multimeter reading for a good thermostat? A reading at or near zero ohms, or a beep on a continuity setting, generally indicates the thermostat has continuity. No reading, or a reading that doesn’t change with the dial, points to a failed thermostat.
Should I set my water heater thermostat higher than 120 degrees? Generally no. Around 120 degrees Fahrenheit balances comfort and energy use while reducing scald risk, and pushing it higher mainly increases the chance of injury and higher energy costs rather than solving a hot water shortage.