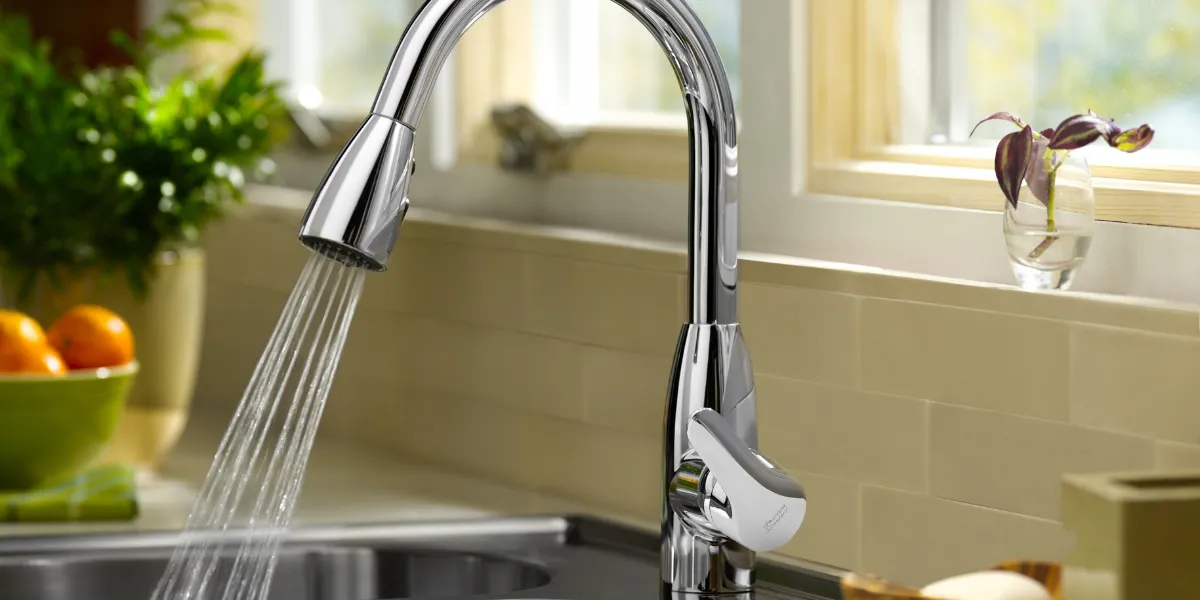
A single-handle faucet almost always leaks because the internal cartridge, ball, or ceramic disc has worn out or collected mineral deposits. Shut off the water, remove the handle to expose the cartridge or ball assembly, pull it out, and replace it (or clean it, in the case of ceramic discs) with an exact match for your faucet brand and model. Most repairs take 30–60 minutes and cost $10–$40 in parts.
A dripping single-handle faucet is one of the most common plumbing complaints in any home — and one of the most misunderstood. Unlike a two-handle faucet, where a worn rubber washer is almost always the culprit, a single-handle faucet uses one of three very different internal mechanisms to control both flow and temperature: a ball valve, a cartridge, or a ceramic disc. The fix that stops the drip depends entirely on which one is inside your faucet.
This guide walks through every part of that process: identifying your faucet type, gathering the right tools, shutting off water safely, disassembling the handle without damaging it, diagnosing exactly what’s failed, and reassembling everything so the leak actually stays gone. It also covers the mistakes that cause a “repaired” faucet to start leaking again within days.
Why Single-Handle Faucets Leak
A single-handle faucet leaks for one of a small number of reasons, and narrowing it down first saves you a wasted trip to the hardware store.
- Worn cartridge or ball seals. Every time you move the handle, small rubber seats, springs, or O-rings inside the mechanism compress and release. Over years of use, they lose their shape and stop sealing completely, allowing water to seep past even when the handle is fully off.
- Mineral and sediment buildup. Hard water leaves calcium and lime deposits on moving parts. This is especially common with ceramic disc cartridges, where even a thin layer of grit between the two discs prevents a full seal.
- A cracked or scratched ceramic disc. Ceramic is extremely durable, but it can crack if the handle is forced or if grit gets ground between the discs. A cracked disc cartridge needs full replacement — cleaning won’t fix it.
- Damaged O-rings at the base or spout. If water is pooling around the base of the faucet rather than dripping from the spout, the leak is usually in the O-rings that seal the spout housing to the faucet body, not the cartridge itself.
- Loose parts from age or improper reassembly. A faucet that was serviced before and starts leaking again soon after is frequently a sign of an adjusting ring that wasn’t tightened, or a cartridge that wasn’t seated all the way.
Step 1: Identify Your Faucet Type
Before buying any parts, figure out which of the three single-handle mechanisms you have. This single decision determines the entire repair.
- Ball faucet: Common in kitchens, especially on Delta faucets manufactured before roughly 2010. The handle sits on a rounded dome directly above the spout, and there’s often a small set screw on the side of the handle rather than under a cap.
- Cartridge faucet: The handle moves with a firm up-and-down motion rather than a smooth rotation, and stops solidly at the “full on” and “full off” positions.
- Ceramic disc faucet: The handle feels smooth and almost frictionless, with no spring-back, and it stays exactly where you leave it. These are common on newer, higher-end single-handle faucets.
You can confirm the type for certain only after removing the handle, which is the next step regardless of which type you suspect.
Step 2: Gather Tools and Shut Off the Water
Tools and materials you’ll typically need:
- Adjustable wrench or slip-joint pliers
- Allen wrench (hex key) set
- Flathead and Phillips screwdrivers
- Needle-nose pliers
- Plumber’s grease (silicone-based)
- Replacement cartridge, ball kit, or ceramic disc cartridge matched to your faucet’s brand and model
- A towel and a small container for screws
Shutting off the water:
- Locate the shutoff valves under the sink and turn both the hot and cold valves clockwise until they stop.
- If there are no valves under the sink, or they won’t turn, shut off the main water supply to the house.
- Turn the faucet handle on fully to release any pressure and drain the water remaining in the lines.
- Plug the sink drain or cover it with a towel — small screws and springs disappear into open drains constantly during this repair.
Step 3: Remove the Handle
Handle removal varies slightly by faucet model, but the general sequence is the same:
- Look for a decorative cap on top of or behind the handle. Pry it off gently with a flathead screwdriver — many are just snapped or threaded on.
- Underneath the cap, you’ll find a screw (Phillips or Allen/hex) holding the handle in place. Remove it and set it aside somewhere it won’t roll away.
- Lift or pull the handle straight off the faucet body. If it’s stuck from mineral buildup, wrap a vinegar-soaked cloth around the base for a few minutes to loosen deposits before trying again.
- With the handle off, you’ll see either a domed cap over a ball assembly, a retaining clip over a cartridge, or a wide cylindrical housing containing a ceramic disc cartridge — confirming which type of faucet you’re working on.
Step 4: Repair by Faucet Type
Fixing a Ball Faucet
- Use tongue-and-groove pliers to loosen and remove the domed cap, protecting the finish with a cloth first.
- Lift out the cam and cam washer, then remove the metal or plastic ball assembly with needle-nose pliers.
- Inspect the ball for pitting, cracking, or scoring — if it’s damaged, replace it as part of a full repair kit rather than reusing it.
- Use a flathead screwdriver to pull out the old rubber seats and springs from inside the faucet body, noting their orientation.
- Install new seats and springs from the repair kit in the same orientation, then reinsert the ball, aligning its slot with the pin inside the faucet body.
- Replace the cam and cam washer, aligning the lugs correctly, then thread the domed cap back on — snug, not overtightened.
Fixing a Cartridge Faucet
- Remove any retaining clip or threaded retaining nut holding the cartridge in place, using pliers or a small screwdriver depending on the design.
- Grip the top of the cartridge stem with pliers and pull straight up firmly. Cartridges can be stubborn — a gentle rocking motion helps break the seal without cracking the housing.
- Take the old cartridge with you when buying a replacement. Cartridges are brand- and model-specific, and even cartridges that look identical can have different heights or spline patterns that won’t seal correctly.
- Coat the new cartridge’s O-rings lightly with plumber’s grease, then press it into the housing in the same orientation as the original, lining up any flat sides or tabs.
- Reinstall the retaining clip or nut, making sure the cartridge sits flush and doesn’t rock side to side.
Fixing a Ceramic Disc Faucet
- Remove the cylindrical cartridge housing, usually held by two or three screws visible once the handle is off.
- Lift out the ceramic disc cartridge and inspect the underside for scratches, chips, or hairline cracks in either disc.
- If the discs are simply coated with mineral buildup and show no physical damage, soak them in white vinegar for 30–60 minutes, then gently scrub with a soft brush and rinse. This alone resolves a large share of ceramic disc leaks.
- If a disc is cracked or the buildup won’t clear, replace the entire ceramic disc cartridge — the discs are matched pairs and are not sold or repaired individually.
- Reinstall the cartridge in the same orientation, replace the screws evenly (don’t overtighten one side before the others), and make sure the rubber seals on the underside of the cartridge sit flat against the faucet body.
Step 5: Reassemble and Test
- Reverse the disassembly steps: cartridge or ball first, then cam/retaining clip, then handle, then decorative cap.
- Turn the water supply valves back on slowly.
- Before turning on the faucet, remove the aerator from the spout tip and run the water for 30–60 seconds into a cup. This flushes out any air, grit, or debris loosened during the repair, which would otherwise lodge in the new cartridge or aerator and cause a new leak or reduced flow.
- Reinstall the aerator, then turn the handle through its full range of motion — hot, cold, and fully off — checking for drips at the spout and around the base of the faucet with a dry hand or paper towel.
- Let the faucet sit off for 10–15 minutes, then check again. A leak that reappears after sitting usually means a seal wasn’t seated correctly rather than a defective part.
Common Reasons a “Fixed” Faucet Leaks Again
- Wrong cartridge or ball for the model. Many brands used multiple cartridge generations across the years; a visually similar part can still be the wrong height or spline count.
- O-rings installed dry. Skipping plumber’s grease on new O-rings increases friction and the chance of a pinched, torn seal during installation.
- Overtightened adjusting ring or retaining nut. This can distort seals rather than compress them evenly, causing a slow drip that wasn’t present before the repair.
- Debris trapped under the ball or disc. Any grit left in the faucet body during reassembly will sit between the sealing surfaces and prevent a full shutoff.
- Confusing a spout leak with a base leak. Water at the base of the faucet points to the O-rings sealing the spout to the body, not the cartridge — replacing the cartridge won’t stop a base leak.
When to Call a Plumber
Most single-handle faucet leaks are a manageable weekend repair. It’s worth calling a professional if:
- The shutoff valves under the sink are seized or won’t hold, since forcing them can create a bigger leak than the one you started with.
- The faucet is leaking from a supply line connection rather than the handle itself.
- You’ve replaced the cartridge or ball correctly and the faucet still leaks, which can point to a problem with the faucet body itself rather than its internal parts.
- The faucet is old enough, or damaged enough, that full replacement makes more sense than continuing to source parts for it.
Frequently Asked Questions
How do I know if my single-handle faucet has a ball, cartridge, or ceramic disc? Remove the handle. A ball faucet reveals a domed cap over a rotating metal or plastic ball. A cartridge faucet reveals a cylindrical stem that moves up and down. A ceramic disc faucet reveals a wide, flat cartridge housing with two ceramic discs inside.
Can I fix a leaky single-handle faucet without replacing parts? Sometimes. Mineral buildup on a ceramic disc cartridge can often be cleared with a vinegar soak, restoring a full seal without replacing anything. Ball and cartridge faucets are less likely to be fixed by cleaning alone, since their seals are rubber and degrade rather than just accumulate deposits.
How long does a single-handle faucet cartridge last? Ceramic disc cartridges typically last 15–20 years. Ball and standard cartridge assemblies usually last 8–15 years depending on water hardness and use.
Why does my faucet still drip after I replaced the cartridge? This usually means the O-rings weren’t greased before installation, the cartridge isn’t fully seated, or the replacement part isn’t an exact match for your faucet’s brand and model.
Is it cheaper to repair or replace a single-handle faucet? A cartridge, ball, or ceramic disc repair typically costs $10–$40 in parts. Full faucet replacement usually starts around $100–$300 for the fixture alone. Repair is almost always the better first move unless the faucet body itself is cracked or corroded.