A running toilet is usually caused by a worn flapper, a float set too high, or a failing fill valve. Fixing it means checking these three parts in order: test the flapper’s seal first, since it’s most common, then check the float height, and inspect the fill valve if needed.
A running toilet isn’t just an annoying sound. It can waste hundreds of gallons of water a day, quietly adding a significant amount to your water bill until it’s fixed. The good news is that the cause almost always comes down to one of three inexpensive parts, and diagnosing which one is responsible takes only a few minutes.
This guide walks through how a toilet tank works, how to test each likely cause in order, and the exact steps to fix the most common ones yourself.
How a Toilet Tank Works
Understanding the basic mechanism makes it much easier to figure out where the problem is coming from.
The Flapper
The flapper is a rubber seal at the bottom of the tank that lifts when you flush, releasing water into the bowl, then drops back down to reseal the tank so it can refill.
The Float
The float rises with the water level as the tank fills and shuts off the fill valve once the water reaches the correct height, typically about an inch below the top of the overflow tube.
The Fill Valve
The fill valve controls water flowing into the tank from the supply line, refilling it after every flush and stopping once the float signals that the tank is full.
Why a Running Toilet Happens
A running toilet means water is escaping somewhere it shouldn’t, so the fill valve keeps working to replace it. There are only three common ways this happens: a flapper that doesn’t seal, a float set too high so water spills into the overflow tube, or a fill valve that doesn’t fully shut off.
Why This Order Matters
Diagnosing in this specific order, flapper first, then float, then fill valve, matters because a worn flapper accounts for the large majority of running toilet cases. Starting with the least likely cause wastes time and, in the case of a fill valve replacement, involves more effort than necessary if the actual problem is a five-dollar flapper.
Step One: Diagnose Which Part Is the Problem
Before replacing anything, a quick check tells you exactly which component needs attention.
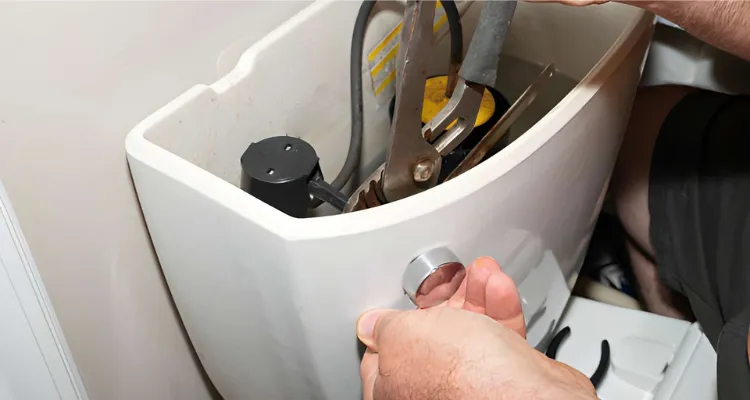
Remove the Tank Lid Carefully
Set the tank lid somewhere safe on a towel, since porcelain lids crack easily if set down on a hard surface.
Watch a Full Flush Cycle
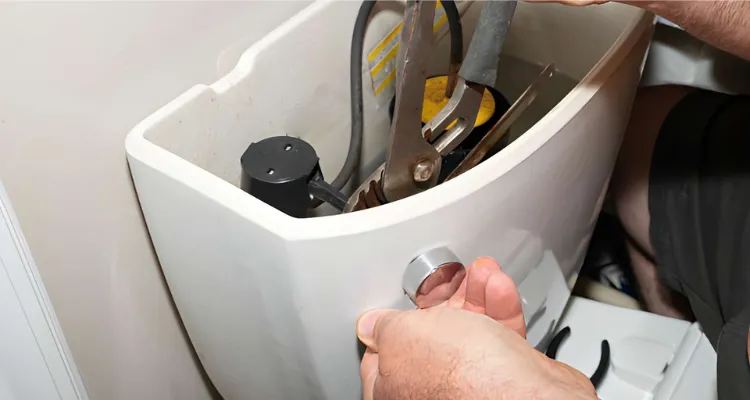
Flush the toilet with the lid off and watch where the water goes and how the tank refills. This alone often reveals the problem, whether that’s water spilling into the overflow tube or the flapper not sealing properly after the flush.
Check the Water Level
Look for a marked fill line on the inside back of the tank, or measure about an inch down from the top of the overflow tube if there’s no visible mark. If the water sits above this line or is actively flowing into the overflow tube, the float is set too high.
Test the Flapper Seal
Once the tank has stopped filling, push down gently on the flapper. If the running stops immediately, the flapper isn’t sealing properly and needs to be replaced or cleaned.
Listen Before You Look
Sometimes the sound alone tells you most of what you need to know. A faint, continuous hiss usually points to the flapper or fill valve not sealing, while water audibly spilling into the overflow tube points more directly to the float. Listening for a few seconds before opening the tank can help you narrow down where to focus first.
Step Two: Fix a Faulty Flapper
Since a worn flapper is responsible for most running toilets, this is the first fix to try.
Signs the Flapper Is the Cause
A flapper that’s stiff, warped, cracked, or coated in mineral buildup won’t create a tight seal against the flush valve opening, letting water trickle continuously into the bowl.
How to Confirm It
Turn off the water supply valve, mark the current water level in the tank with a pencil, and wait about 20 to 30 minutes. If the water level has dropped below your mark, the flapper is leaking. A few drops of food coloring in the tank, checked after 30 minutes to see if color appears in the bowl, works as an alternative test method.
How to Replace the Flapper
Turn off the water supply and flush to drain most of the tank. Disconnect the flapper chain from the flush lever, then unhook or slide the old flapper off the pegs on the sides of the flush valve tube. Attach the new flapper the same way, connect the chain, and turn the water back on to test with a flush.
A Note on Flush Valve Styles
Standard flapper-style flush valves are the most common design in residential toilets, but some models use a tower or canister flush valve with a different type of seal instead of a hinged flapper. If your toilet uses this style, the replacement part and process look somewhat different, so identifying your specific flush valve type before purchasing a replacement part saves an unnecessary return trip to the store.
Getting the Chain Length Right
The chain should have a small amount of slack, roughly half an inch to an inch. A chain that’s too long can get caught under the flapper, preventing a full seal, while a chain that’s too short holds the flapper slightly open. Adjust in small increments and test with a flush after each change.
Choosing a Replacement Flapper
Bringing the old flapper to the hardware store, or noting your toilet’s brand and model, helps you find a matching replacement, since flappers vary in size and shape between manufacturers. A properly matched flapper seats correctly against the flush valve opening, while an ill-fitting universal flapper sometimes leaks even when installed correctly.
Step Three: Adjust the Float
If the flapper checks out fine but water is spilling into the overflow tube, the float is likely set too high.
How Float Adjustment Works
Most fill valves include either an adjustable float ball on an arm or a float cup that slides along the fill valve shaft. Lowering the float reduces the water level the tank fills to before shutting off.
Adjusting a Float Arm
Gently bend the float arm downward to lower the water level, then flush and check where the water stops relative to your marked fill line. This may take a couple of small adjustments to get right.
Adjusting a Float Cup
Look for an adjustment screw or clip near the top of the fill valve, typically turned or squeezed to lower the float cup’s position along the shaft. Adjust gradually and retest after each change.
Why Float Height Affects More Than Just Running
A float set too high wastes water through the overflow tube, while a float set too low can leave the tank without enough water for a full, effective flush. Getting the height right isn’t just about stopping the running sound, it also affects how well the toilet flushes going forward.
Step Four: Service or Replace the Fill Valve
If the flapper seals properly and the float is set correctly but the toilet still runs, the fill valve itself is likely the cause.
Signs of a Failing Fill Valve
Water continuing to trickle or run even after the tank appears full, a fill valve that makes unusual noise, or water that won’t fully shut off point toward a fill valve problem rather than the flapper or float.
Cleaning Debris From the Fill Valve
Sediment or debris can occasionally lodge inside the fill valve and prevent it from closing fully. Turning off the water, flushing to drain the tank, and removing the fill valve cap to flush out any trapped debris can sometimes resolve the issue without a full replacement.
Replacing the Fill Valve
If cleaning doesn’t help, replacement is usually straightforward. Turn off the water supply, flush to drain the tank, disconnect the supply line, and remove the old fill valve, typically secured with a locknut underneath the tank. Install the new valve following the manufacturer’s instructions, reconnect the supply line, and test for leaks once the water is back on.
Attaching the Refill Tube Correctly
Most fill valves include a small refill tube that directs a portion of the incoming water into the overflow tube to refill the bowl after a flush. Make sure this tube sits securely above the rim of the overflow tube rather than dangling loosely, since a misplaced refill tube can cause water to spray oddly or fail to refill the bowl properly.
Diagnosing Which Part Is at Fault
| What You Observe | Likely Cause | Next Step |
|---|---|---|
| Running stops when you push down on the flapper | Worn or misseated flapper | Replace the flapper |
| Water level drops below your pencil mark after 20-30 minutes with water off | Leaking flapper seal | Replace the flapper |
| Water spills into the overflow tube | Float set too high | Lower the float |
| Tank fills correctly but keeps running afterward | Failing fill valve | Clean or replace the fill valve |
| Fill valve makes unusual noise or won’t shut off | Fill valve malfunction | Replace the fill valve |
What to Check After Any Repair
Confirming the fix actually worked prevents a repeat trip to troubleshoot the same issue.
Test With Multiple Flushes
Flush the toilet a few times in a row and listen closely afterward, since some issues only reappear after a couple of flush cycles rather than the very first one.
Recheck for Leaks
Look around the base of the toilet, the water supply line connection, and the tank itself for any pooling water, and tighten any loose connections you find.
Confirm the Water Level
After the tank refills, check the water level one more time against your marked line to confirm it’s settling at the correct height rather than continuing to creep upward.
Give It a Day Before Assuming It’s Fixed
Some slow leaks only become noticeable again after several hours, so checking back the next morning, rather than assuming the repair is complete right after the first successful flush, gives you more confidence that the fix actually held.
When a Running Toilet Points to a Bigger Issue
Occasionally, a running toilet is a symptom of something beyond the standard three-part fix.
A Flush Valve That Needs Replacement
If the flapper seat itself, the part of the flush valve the flapper seals against, is corroded or damaged, a new flapper won’t create a proper seal no matter how well it’s installed. In this case, replacing the entire flush valve assembly is usually necessary.
Persistent Issues After Replacing Parts
If you’ve replaced the flapper and fill valve and adjusted the float, but the toilet still runs intermittently, there may be a less obvious issue, such as a cracked overflow tube or a tank-to-bowl gasket problem, that’s better diagnosed by a professional.
Water Quality Considerations
Homes with hard water or sediment-heavy water supplies sometimes see faster wear on flappers and fill valves than homes with cleaner water, since mineral buildup accelerates degradation of the rubber and plastic components involved. If you find yourself replacing these parts more frequently than seems typical, water quality may be a contributing factor worth mentioning to a plumber.
When to Call a Professional
Most running toilet repairs are manageable with basic tools and a bit of patience, but a few situations call for professional help. If you’ve worked through all three common causes without success, if you’re not comfortable turning off water supply valves or working inside the tank, or if you notice the toilet rocking or leaking at the base in addition to running, a plumber can diagnose and resolve the issue more efficiently. Toilet Leaking From the Bottom covers what a base leak specifically indicates, separate from a running toilet.
A plumber can also help if this is a recurring issue on the same toilet, since repeated running problems sometimes point to an aging toilet that would benefit more from a full tank rebuild or replacement than another individual part swap. How Much Does Toilet Repair Cost breaks down what these repairs typically cost if you’re weighing DIY against hiring a professional, including situations where replacement ends up being the more practical choice.
Frequently Asked Questions
Why does my toilet randomly start running on its own?
This is usually caused by a worn flapper that’s slowly leaking water into the bowl, which drops the tank’s water level enough to trigger the fill valve intermittently rather than continuously. Testing the flapper seal, as described earlier in this guide, is the best way to confirm this.
How much water does a running toilet actually waste?
A running toilet can waste 200 or more gallons of water per day in more severe cases, which can add a significant and unexpected amount to a water bill if left unaddressed. Even a slow, minor leak that isn’t obviously audible adds up meaningfully over the course of a billing cycle.
Can I fix a running toilet without turning off the water?
You can diagnose the issue with the water on, but any actual repair, including replacing the flapper or fill valve, requires turning off the water supply valve first to avoid an uncontrolled flow of water while you work.
How do I know if it’s the flapper or the fill valve?
Push down on the flapper while the toilet is running. If the running stops, the flapper is the cause. If pushing the flapper down doesn’t stop the running, or the tank continues filling well past the marked water line, the fill valve is more likely responsible.
Is a running toilet an emergency?
It’s not typically an emergency requiring immediate after-hours service, but it shouldn’t be ignored, since the water waste adds up quickly. Addressing it within a day or two is generally reasonable for a standard running toilet without any accompanying leak at the base.
Do all toilets use the same size flapper?
No. Flappers come in different sizes and styles to match different flush valve openings, and some toilets use a tower or canister-style flush valve that requires a specific replacement seal rather than a standard flapper. Checking your toilet’s model or bringing the old flapper to the store helps ensure a correct match.
How long does it take to fix a running toilet?
Most running toilet repairs take between 10 and 30 minutes once you’ve identified the cause, whether that’s replacing a flapper, adjusting the float, or swapping the fill valve. Diagnosing which part is responsible, using the steps in this guide, usually takes just a few minutes on its own.
Getting Your Running Toilet Fixed
If you’ve tried the steps above and your toilet is still running, El Paso Plumbing can diagnose the exact cause and fix it correctly. Call (915) 285-0087 or request service online to schedule a repair.